Tuesday, November 30

Gina K Previews Day 2

Hello and welcome to Gina K. December Previews Day 2! Tonight, we are showcasing 2  great sets: The Giving Tree by Theresa Momber and Nesting by Asela Hopkins.

Here are the cards I made.

The Giving Tree

Directions:
  • Make card from Kraft cardstock (A2 size)
  • On a piece of Kraft cardstock, stamp tree and snowflakes in Versamark Ink, add White embossing powder and heat it up.
  • On a piece of White cardstock, stamp sentiment in Versamark Ink, add Gold Embossing powder and heat it up. Cut this piece, ink edges and adhere it to Kraft piece.
  • Mat Kraft piece with a White piece of cardstock. Adhere to card.
  • Add some Star Dust Stickles on snowflakes, tree branches and borders.

Card recipe:

Nesting

Directions
  • Make ard from Innocent Pink Cardstock. A2 size.
  • Cut a piece of White cardstock (5" x 3.75") Dry embossed bottom part with Swiss Dots folder. Ink all edges. Tie ribbon around and adhere to card.
  • Die-cut a rectangle piece on an Innocent Piece and White color cardstock. Adhere them to card.
  • Stamp butterflies onto White cardstock in Light Pink Ink, add some Worn Lipstick Distress Ink on the borders and stamp. Cut them out and adhere to white rectangle piece. Add Mini pink Rhinestones.
  • Stamp sentiment on Innocent Pink .
  • Add rhinestones in every corner.

 Card recipe:

For more inspiration using The Giving Tree and Nesting, be sure to check out what the rest of the design team has come up with.

Don't forget to leave a comment in each of the DT blogs for your chance to win one of these 2 new sets!!!
Don't forget that Release Party is this Friday Dec. 2nd over at StampTV!!

Monday, November 29

Gina K Previews Day 1

Hello and welcome to my First Preview Day as a Gina K. DT member, I am so excited!!! The next three days are going to be full of great ideas and tons of inspiration, be sure to visit all the DT blogs.
Tonight we are showcasing 2 sets: Block Greetings by Tami Mayberry and Mugs & Kisses by Melanie Muenchinger.

Block Greetings.


Directions:
  •  Make card from White cardstock. 4.25" square. Scor front top part at 1/4" and 1/2 ". Add some paper piercing.
  • Die-cut a piece of Sweet Mango cardstock with Fleur de Lis Dies. Ink all edges. Adhere to card with foam tape.
  • Stamp frame onto White cardstock in Walnut Stain Distress ink. Stamp sentiment in Tea Dye Distress Ink. Ink all edges.
  • Adhere to card with foam tape.
  • Add mini pearls to frame.


Card Recipe:

Mugs & Kisses

Directions:
  • Complete instructions how to make this Tea Bag Holder "HERE".
  • Ink all edges.
  • Stamp image onto patterned paper and Little Blue Boy Cardstock. Paper pieced images.
  • Die-cut a piece of Ivory Cardstock with Label 3 Nestabilities, emboss and stencil as well.
  • Tie ribbon around.  Add rhinestones and flower.

Card recipe:

For more inspiration using Block Greetings and Mugs & Kisses, be sure to check out what the rest of the design team has come up with

Don't forget this Thursday December 2nd is the release party at StampTV.
Thanks for stopping by!!

Friday, November 26

Merry & Bright

Hello my friends! It is time for another CSS Blog Hop and if you are coming from the fabulous Cheri, you are in the right place. This time is an Inspiration Challenge from this picture.

I got inspired by the Classic Christmas colors.

Here is my card:
Merry & Bright.

Directions:
  • Make card base from Lipstick Red Cardstock.
  • Stamp background saying from "Blessed is the Season" onto a White piece of Cardtsock in Gold Pearlescent Ink. Ink all edges and mat it with a piece of All Spruced Up cardstock. Add straight stitches.
  •  Add Gold and Holiday Ribbon to card.
  • Stamp snowflake on a White piece of cardstock in Real Red Ink. Die-cut, emboss and stencil with Circle Nestabilities. Add Star Dust Stickles and Red Rhinestone.
  • Stamp sentiment. Add Rhinestones.


Card recipe:

Now hop over to Joy's blog and enjoy her wonderful creation.

Have fun hopping!

Baby Bud Challenge: Winter/Christmas

Hello my friends! I hope you all who celebrated Thanksgiving had an awesome day!! We had a fun time just us 3, my daughter has been really sick, she is feeling much better now and now I am sick. Too many nights laying next to her and hugging and cuddleing her, makes me the winner of the crazy bug she got, LOL.

Anyway, it is time for another Baby Bud Challenge, this time is Winter/Christmas theme! and a freebe Friday, better go to the Baby Bud Blog and grab it so you can play along with us! Also, you can visit the etsy store and find all the cutest Baby Bud Images!!

This is the card I made using "Holly" a brand new Baby Bud. Isn't she cute? I paper-pieced her dress, colored her with Copic Markers and added a really Christmas gold ribbon.


Hope you like it!
Have a great day!!

Big Sale!!

Thursday, November 25

Happy Thanksgiving

I wish all of you a Happy Thaknsgiving. Enjoy your family together, the yummy food and build memories you and your kids will remember forever.


Wednesday, November 24

Create a Window Scene Collection Sneak Peek

Hello and happy Wednesday! I've missed blogging, but my daughter got really sick and yesterday she finally started feeling a little bit better, at least no more fever and I hope better nights to sleep. I really want the last one.

Anyway, it is time to showyou a sneak peek of the new "Create a Window Scene Collection", I have to tell you this collections is so pretty!! You have to go to the Heartfelt Creations Blog and you are going to be amaze with all the creations from the Design Team. Lots and lots of eye candy.


Hope you like them!
Have a great day!

Friday, November 19

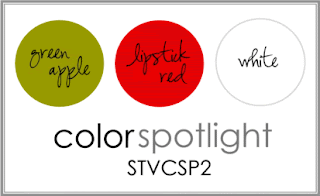
Color Spotlight

Hello my friends and Happy Friday! I have a Christmas card for you today. I played with Color Spotlight Challenge from StampTV, so if you have the chance to stop by and play along with us.


Directions:
  • Make a card base from Green Apple cardstock. 4.5" square.
  • Cut a piece of Lipstick Red 4 1/8" square. Create a frame using Square Nestabilities, emboss inside borders. Stamp this piece in Brilliance Pearlescent Ink, I used the snowflake from "Blessed is the season"
  • Mat this piece with a slightly bigger white piece. Emboss the center and add stitches.
  • Stamp dove in Pearlescent Rust. Add stickles and set to dry.
  • Add ribbon and mini snowflakes.
  • Inside: Punch snowflake borders and add it to a white piece, Stamp sentiment and adhere to card.

Card Recipe:
  • Cardstock: Green Apple, Lipstick Red, White (GKD)
  • Stamp: Blessed is the season (Gina K. Designs)
  • Ink: Pearlescent Gold, Pearlescent Rust, Memento Rich Cocoa (Tsukineko)
  • Embellishment: Holiday Ribbon (GKD).
  • Accessories: Square Nestabilities (Spellbinders), Snowflake punch (EK Success), Star Dust Stickles (Ranger), Sewing machine.
Hope you like it!
Have a great day!

Thursday, November 18

Blog in progress

Sorry about the big mess, I am trying to fix it, but it is taking way too long. I hope I can fix it soon.
Thanks for your patience.
Giovana

Thanks!

Hello my friends! Hope you are having a great day, my day here is crazy, just to tell you my DD and Miss.E follow this pattern: Drama-Cry-Hugs-More Drama. So far, they are doing Ok, watching "Alvin & the Chipmunks", so I have few minutes to post a pretty card I made last night.
Last week I checked "Wee Memories Chalenge" and it is about using your Dusty Patterned Paper. Almost a year ago I got this pretty paper from Webster Pages and I hardly use it because it is too pretty, LOL. So, thanks Jennie for pushing me to use my pretty paper :)

Submitting thid card to:


Directions:
  • Make card from cardstock.
  • Cut a piece of Patterned paper 5 1/8" x 3 7/8", ink all edges. Adhere ribbon. Stamp image.
  • Using the smallest flower from Posy Patch Flowers set, stamp it on the same patterned paper in Worn Lipstick. Die-cut flowers using Posy Die-cut , ink all edges and adhere to image. Add Star Dust Stickles.
  • Die-cut border in Green cardstock and adhere to paper. Add little mini pearls.
  • Cut a tag shape (I used my Cricut) and stamp sentiment from Elegant Atumn Swirl Set in Walnut Stain, ink all edges in Worn Lipstick.


Card Recipe:
Hope you like it.
Your comments always make me happy :)

Wednesday, November 17

So thankful for you

Hello my friends! Hope you are having a great day. Here it's really gray, makes me sad to look outside, but to bright my and yours, nothing more excited than stamp! So, here I have another card for you. I used more Heartfelt Creations Stamps.

I am submitting this to:
2S4U : Sketch.
The Shabby Tea Room: Thankful card
The Siterhood of crafters: Thanksgiving or Thankful

Directions:
  • Make card base from Kraft cardstock. A2 size.
  • Cut a piece of Chocolate brown cardstock: 3 7/8" x 5 1/8".
  • Cut a piece of Ivory cardstock: 3.75" x 5". Stamp background image in Antique Linen Distress. Ink all edges and distress. Mat it with Chocolate Brown cardstock.
  • Adhere ribbon.
  • Cut a piece of Chocolate Brown 3.75" x 1.5". Mat it with an embossed Ivory Cardstock piece. Ink all edges.
  • Die-cut a square piece. Stamp leaves and die-cut them.
  • Die-cut a circle frame using Circle Nestabilities, adhere leaves to create a wreath. Add Diamond Glaze and Copper Stickles. Adhere to card. Add bow.
  • Stamp sentiment in Walnut Stain Distress Ink.


Card recipe:
Hope you like it.
Have a great day!

Love is and Happy Holly days.

Hello my friends! It is Wednesday and time to showcase more Heartfelt Creations projects. I will recomend you to visit the Heartfelt Creations Blog, today's post has tons of eye candy and inspiration.

Today, I have 2 projects for you.

Love is patient.

Directions:
  • Make card base from White Cardstock A2 Size.
  • Stamp saying from HCPC 3308 Agape Love PreCut Set onto White cardstock in Memento Tuxedo Black Ink.
  • Die-cut circle frame using Circle Nestabilities in Red Cardstock.
  • Stamp Posy images from HCPC 3303 Posy Patch Flowers PreCut Set on Light Pink cardstock in Red Ink. Die-cut flower with HCD 701 Posy Patch Diecut.
  • Mount Posy flower together. Add Pearl and add some glitter from Antique Rose Pee Wee Kit to all edges.
  • Adhere flower to card.
  • Score lines at the bottom part of the card and tie ribbon around


Card recipe:
  • Cardstock: White (GKD), Real Red, Blush Blossom (SU).
  • Stamps: HCPC 3303 Posy Patch Flowers PreCut Set, HCPC 3308 Agape Love PreCut Set. (Heartfelt Creations)
  • Ink: Memento Tuxedo black (Tsukineko), Real red (SU), Worn Lipstick Distress (Ranger)
  • Embellishments: Satin Pink Ribbon (Offray), Pearl (Recollections)
  • Accessories: HCD 701 Posy Patch Diecut (Heartfelt Creations) Antique Rose Pee Wee Kit Glitter, Circle Nestabilities (Spellbinders), Foam tape, sponges, Scor-buddy.

Happy Holly Days.

Directions:
  •  Make card from from Red Cardtsock. Size 5" x 4.25"
  • On a piece of White Cardstock, stamp Pine branches as a background from HCPC 3326 Holly Berry Filler PreCut Set in Antique Linen Ink. Ink all edges using Tea Dye Ink.
  • On a piece of White Cardstock 3.5" x 2.75" stamp Pine branches in Certainly Celery Ink and Pine cones in Tea Dye Ink on the left corner. Stamp sentiment on the bottom part in Memento Tuxedo Black. Ink all edges.
  • Mat this piece with a bigger red piece of cardstock. Distress all edges and add stitches.
  • Add this piece to card with foam tape. Add green dewdrops from Poinsettia Dewdrops Jar.
  • Add Diamond Stickles to image and borders of Big White Cardstock.


Card recipe:
  • Cardstock: Real Red (SU), White (GKD)
  • Stamps: HCPC 3326 Holly Berry Filler PreCut Set (Heartfelt Creations)
  • Ink: Memento Tuxedo Black (Tsukineko), Certainly Celery (SU), Antique Linen, Tea Dye, Walnut Stain (Ranger)
  • Embellishments: Poinsettia dewdrops (Heartfelt Creations), Diamond Stickles (Ranger)
  • Accessories: Distresser (CTMH), Sponges, Foam tape, Sewing machine.
I am submitting this card to Crazy 4 Challenges : Christmas card or item

Hope you like them!
Have a great day!!

Tuesday, November 16

Blue Merry Christmas

Hello my friends! Yesterday I tried to post this card, but I couldn't find my camera, LOL. After looking around and around (sometimes just where the camera was) I found it!
I decided to make a Blue Christmas card this time. I used the sketch from STV.


Submitting this to:
Directions:
  • Make card from cardstock. A2 size.
  • Cut a piece of Little Blue Boy CS 3.75" x 5".
  • Cut a piece of Ivory CS 3.5" 4.75". stamp snowflakes from "Blessed is the Season" set in Bashful Blue Ink, ink all edges with Broken China Distress Ink. Mat this piece with Little blue Boy one. Add stitches. Adhere to card.
  • Cut a piece of Ivory 4.25" x 2.5". Stamp trees image in Versamark Ink. Add Gold Embossing powder and heat it up. Mat this with a 4.25" x 2.75" of Little Blue Boy CS. Ink all edges and add stitches.
  • Stamp sentiment from "Fanciful Tags" set on Ivory CS in Memento Tuxedo Black. Mat it with a piece of In the Navy CS. Add rhinestones.
  • Adhere to card.


 Card recipe:
Hope you like it.
Have a great day!

Monday, November 15

Great news!!!

Hello my friends! I planned to post some projects this weekend, but I felt a little bit under the weather. Last Friday, my dear aunt passed away, that really broke me down and I had a weekend with up and downs. But, I hope this week it is great. And it is in fact {insert a big HUGE smile here}, few weeks back I got an e-mail from Gina K. asking me if I would like to be part of her Design Team!! Are you serious?? Who could say No!! so I say YES!! (excuse me for all the exclamation points)

So, I am starting my week with great news and I want to say Thanks so much Gina!!


Photobucket


Also, I have a card for you today. It is very Clean and Simple, but I really like it.

Directions:
  • Make card from White cardstock in A2 size. ink all edges.
  • Die-cut a piece of White cardstock using Fleur de Lis dies, emboss and stencil it.
  • Adhere to card with foam tape.
  • Stamp butterfly on Lemon Drop cardstock in Versamark Ink, add White embossing powder and heat it up. Cut out image and ink all edges.
  • Add Rhinestones and adhere to card with a glue dot.
  • Stamp sentiment in Memento Rich Cocoa.


Card recipe:
  • Cardstock: White, Lemon Drop (Gina K. Designs)
  • Stamps: Friends, Hope is Faith (Gina K. Designs)
  • Ink: Versamark (Tsukineko), Memento Rich Cocoa (Tsukineko).
  • Embellishments: Clear rhinestones (Recollections)
  • Accessories: Fleur de Lis Dies (Spellbinders), White embossing powder, Embossing heat gun, foam tape, sponges.
Thanks so much for letting share my great news with you and I hope you like my card.
Have a great day!
God bless you.

Friday, November 12

CSS Alumni Blog Hop: Color Challenge

Hello my friends (again) and welcome to another CSS Blog Hop. This month, we have a fun Color Challenge and I know you are going to get so much inspiration from all the CSS wonderful ladies. If you have come from Cheri's blog you are in the right place, if not you should start from Stamp TV!

Blog Hop Details:

Create a card or project using the following color combo:
  • White or Ivory
  • Brown
  • Light Blue (Little Boy Blue, Ocean Mist, or Turquoise Sea)
  • Yellow (Lemon Drop, Sweet Corn, or Wild Dandelion)
and this the card I have created.

Friends

Directions:
  • Make card from White cardstock. 5" square card.
  • Cut a piece of Patterned paper (4.5" square), ink all edges.
  • Cut a piece of Lemon Drop cardtsock (3.5" square), ink all edges and adhere to PP piece. Add stitches and adhere to card.
  • Die-cut a piece of Chocolate Brown cardstock using Label 3 Nestabilities.
  • Stamp sentiment on White Cardstock in Walnut Stain Ink. Die-cut piece using Label 3 Nestabilities.
  • Add white piece on Chocolate Brown piece. Add Ice Blue Rhinestones. Adhere to card with foam tape.
  • Ink all edges to Prima flowers. Mount flowers with a yellow brad. Adhere to card. Add Stickles to all edges.

Card Recipe:
  • Cardstock: White, Lemon Drop, Chocolate Brown (Gina K. Designs)
  • Paper: K&Company.
  • Stamps: Friends (Gina K. Designs)
  • Ink: Walnut Stain Distress, Tea Dye Distress, Antique Linen Distress (Ranger)
  • Embellishments: Yellow Mulberry Flowers (Prima), Ice Blue Rhinestones (Kaisercraft), Yellow Brad (BoBunny), Diamond Stickles (Ranger)
  • Accessories: Sewing machine, Label 3 Nestabilities (Spellbinders), Foam tape, Sponges, Glue dots.
Hope you like it.
Now head over to Janice's blog and enjoy her wonderful creation.

Have fun hopping!!

You make my heart bloom

Hello my crafty friends! Hope you all had a great Veteran's Day. I enjoyed it with my husband, who is a Veteran, and my daughter. We visited some friends,I talked for a while with my dear friend Pia, we went to Applebee's for lunch and after that we went to the movies, we enjoyed "Legend of the Guardians", a really good movie. After that, a little shopping at Michael's and went back home. It was a great family day!!

Anyway, today's card is for the new "Color Spotlight" challenge over at StampTV! Gina has created this new Color challenge and also a video on how to make a pretty card.
The color combo for this week is:


and this is my card:
You make my heart bloom

Directions:
  • Make card from White cardstock. A2 size.
  • Add stitches on each side.
  • Stamp image on White cardstock in Broken China Distress Ink. Die-cut, emboss and stencil it. Stamp sentiment in Real Red Ink.
  • Mat this with a piece of Tempting Turquoise cardstock.
  • Add to card with foam tape. Add turquoise rhinestones and Prima flower to card. Tie embroidery floss to button.
  • Add some Diamond Stickles to image.

Card Recipe:
  • Cardstock: White (GKD), Tempting Turquoise (SU)
  • Stamps: Friends are Forever (Gina K. Designs)
  • Ink: Broken China Distress (Ranger), Real Red (SU).
  • Embellishments: Red Mulberry Flowers (Prima), Turquoise button (Gina K Designs), Turquoise rhinestones (Kaisercraft), Diamond Stickles (Ranger).
  • Accessories: Oval Nestabilities (Spellbinders), Sewing machine, Glue dots, Foam tape, Sponges.
Hope you like.
Have a great day!

On a personal note, I would appreciate if you could pray for my aunt, who is fighting pancreas and stomach cancer. According to the doctors, it's not much to do. She is at her house, and she is just living her last days. My heart is broken and I wish I could be there with my family. Thanks so much.

Wednesday, November 10

Holiday Greetings.

Happy Wednesday and welcome to another Heartfelt Creations showcase day. Today I have a Christmas card for you using HCPC 3316 Poinsettia Petals PreCut Set.

Directions.
  • Make a card base from cardstock : 5" square.
  • Cut a piece of Light pink cardstock (4.75" square), ink all edges with Tea Dye Distress Ink. Stamp background image from HCPC 3338 Petite Medallion Background PreCut Set in Antique linen Distress Ink. Adhere to card.
  • Die-cut Fleur De Lis Pendant in a White piece of cardstock. Adhere to card with foam tape.
  • Stamp Petals (6 times each) on Clear Vellum Cardstock in Worn Lipstick ink. Ink all edges with same ink. Die-cut petals using HCD 704 Perfect Petals Die-cut. Add Diamond Glitter on all edges. Create Poinsettia and adhere to card. Add Rhinestone in the center.
  • Stamp sentiment on card in Walnut Stain Distress Ink from HCPC 3349 cardinal Holiday Mailbox Pre-Cut Set.
  • Add dew drops from Poinsettia Collections.


Card Recipe:
Now, visit the Heartfelt Creations Blog for a lot more inspiration and also Heartfelt Creations is sponsoring Stampin' Sisters in Christ Challenge this week and you have the chance to win $25.00 Gift Certificate :) Super cool!!

Don't forget the Create a Window Scene Collection will include 5 PreCut Stamp sets and a fabulous die. We will be releasing this collection on Thursday, Nov. 25 at 12 Midnight.

Hope you like it!
Have a great day!

Monday, November 8

Happy Birthday

Hello my friends!! Here I am again with a new project for you. Did you check the new Spotlight Sketch over at StampTV? Gina has created an awesome sketch for you to try and also the chance to win a set of your choice, super cool, uh?

This is the sketch:


Happy Birthday Card

Directions:
  • Make card from Ivory cardstock. A2 Size. Ink all edges.
  • On a Light weight Ivory  cardstock, stamp background image in Antique Linen and Tea Dye Distress Ink. Using Versamark Ink, stamp image and add clear embossing powder. Sponge around image to reveal it. Die-cut, emboss and stencil this piece with Oval Nestabilities.
  • Stamp border in Tea Dye Ink and sentiment in Walnut Stain Distress Ink. Die-cut with Fancy Tag Nestabilities.
  • Add image to card. Add sentiment with foam tape. Glue sides to create a 3D effect.
  • Add pearls and paper-pierced left top corner.


Card recipe:
  • Cardstock: Ivory (Gina K. Designs)
  • Stamps: Botanicals, Fanciful tags (Gina K. Designs)
  • Ink: Antique Linen, Tea Dye, Walnut Stain (Ranger)
  • Embellishments: Pearls (Recollections)
  • Accessories: Oval Nestabilities, Fancy Tags (Spellbinders), Sponges, Foam tape, Paper piercing set.
I am submitting this card to:
Wee memories: Birthday Challenge.
Speedy the Cat's Friends: Paper Piercing challenge.

Hope you like my card!
Have a great day!

A New Christmas Baby Bud "Noelle"

Hello my friends and Happy Monday! Today, I want to introduce you to the new addition to the Baby Bud Collection "Noelle", she is a cute Christmas Baby Bud.
Isn't she adorable?! You can get it now at the Baby Bud Etsy Store!
Wanna get more inspiration? Visit the Baby Bud Blog and enjoy the other DT creations.

Directions:
  • Make card from cardstock (A2 Size)
  • Mat a piece of red cardstock and Christmas Patterned paper. Add zig-zag stitches.
  • Print image, color it with Copic Markers. Color an extra image, cut out dress and hat, Adhere to image with foam tape. Add Liquid Applique to Hat, collar dress and button, heat it to develop the bubbles. Add some fine clear glitter.
  • Die cut image with Oval Nestabilities, emboss and stencil it with Red Ink.
  • Die-cut borders using Pink cardstock and add them behind image.
  • Add ribbon . Add image with foam tape.


Card Recipe:
  • Cardstock: Pink Pirouette, Real Red, Blush Blossom (SU), White (GP).
  • Paper: K&Co.
  • Digital Image: Noelle Baby Bud (Baby Bud Designs)
  • Ink: Real red (SU), Copic Markers.
  • Embellishments: Pink Satin Ribbon (Offray), Diamond Stickles (Ranger).
  • Accessories: Sewing machine. Yellow thread, Oval Nestabilities, Decorative Butterfly-Border Die-cut (Heartfelt Creations), Foam Tape, Liquid Applique, Sponges.
I am submitting this card :
Caarvarks: Holiday Card Using Die-cuts.

Hope you like it!
Have a great and blessed day.